The KT Balanced Price Range indicator highlights the overlapping area between two consecutive opposite Fair Value Gaps (FVGs). This concept, known as Balanced Price Range (BPR), is popular among price action traders, especially those following Smart Money Concepts (SMC) and Inner Circle Trader (ICT) methods.
Traders often use these BPR zones to identify high-probability trade setups, especially during pullbacks or when looking for trend continuation opportunities. BPR zones often mark areas where the market could reverse, continue in its trend, or break out, making them key spots for timing entries or exits.
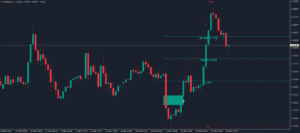
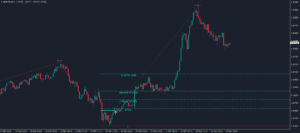
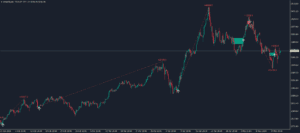
A bullish Balanced Price Range occurs when a bearish FVG is quickly followed by a bullish FVG, with price staying close to the overlapping zone.
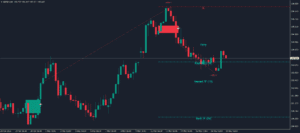
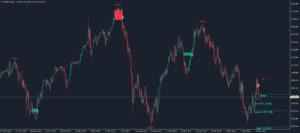
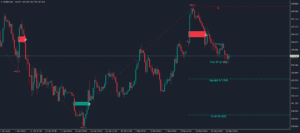
A bearish Balanced Price Range forms when a bullish Fair Value Gap is quickly followed by a bearish FVG, with price remaining near the overlapping zone.
Balanced Price Range setups work best when traded in the direction of the prevailing trend. They are ideal for spotting pullback entries during trend continuation phases.
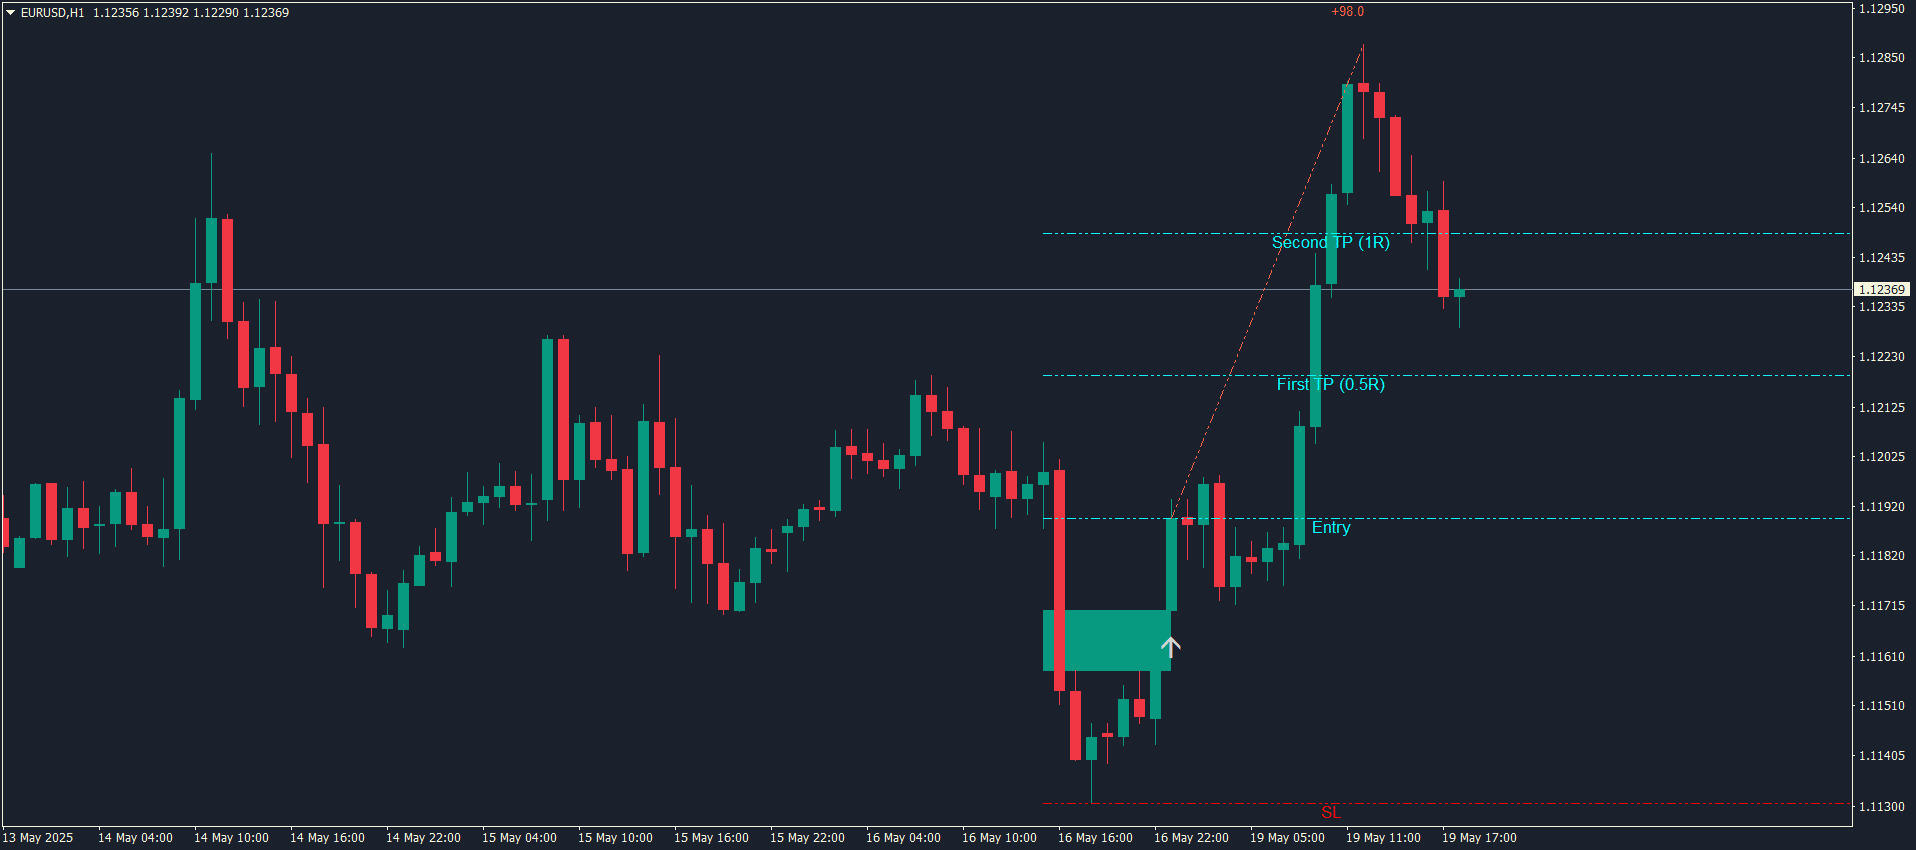
For bullish setups, a stop-loss is typically placed below the BPR zone, with profit targets aligned with recent swing highs.
KT Balanced Price Range indicator can be used on any timeframe, but using it on higher timeframe helps filter out low-quality setups and keeps you aligned with the broader market trend. While BPRs can appear on any timeframe, relying solely on them without higher timeframe context can lead to false signals.
Balanced Price Ranges (BPRs) highlight those rare moments when buying and selling pressure even out, creating temporary balance in the market. When two opposite Fair Value Gaps overlap, they leave behind a zone that often acts as a launch point for the next big move.
Used thoughtfully, KT Balanced Price Range indicator can help you spot high-probability trade setups, stay aligned with the broader trend, and avoid second-guessing your entries.